Friday, December 30, 2011

On Your Day...

A scrapbook page for my baby boy, documenting the front-page headline, winning lotto numbers, local weather, #1 movie, and #1 song on the day he was born.


Supplies:
Background paper by Cosmo Cricket (Mr. Campy collection)
Cardstock by Stampin' Up (Chocolate Chip and Crumb Cake) and Recollections (ivory)
Leaves and acorn embellishments by K&Co.
Font from dafont.com ("It Ain't Rocket Science")
Chipboard letters by American Crafts
Mini Vintage Tag by Stampin' Up

Saturday, December 17, 2011

Festive Gift Wrap and Pinwheel Bows

Just wanted to share some adorable gift wrapping!


I had a special gift to wrap tonight; it was for a secret santa and my husband was the giver.  I figured if it was done with lots of pink and crafty touches, nobody would suspect the only man in the room!  

The paper is from Echo Park's holiday line from last year.  The pinwheels were created VERY easily with a little bit of folding, a little bit of cutting, a Glue Dot and a button.  I love how cute and easy this was to do!  That said, wrapping with quality cardstock is a nightmare; everything had to be scored and it was REALLY tedious!  Consider yourself warned!  

Saturday, December 10, 2011

Christmas 2011

I was quite content to occupy myself in my craft room tonight while my husband had some daddy/son bonding time - he hogs the baby on the weekends since I get to spend the week with him.  :)

I downloaded A Charlie Brown Christmas by the Vince Gauraldi Trio and played it on repeat while I wrapped presents and made a few gift tags.  That's my version of Christmas Bliss!

First of all, I want to share a How The Grinch Stole Christmas rag quilt I've made for my son for his first christmas; I've made a rag quilt for each of the babies in our extended families since my husband and I got married, so I had to make one for James, as well!  I'm really, really happy with how this turned out and I hope it's really special to him as he grows up.


I made a snowman gift tag for one of my mom's gifts; I saw this idea on Pinterest and absolutely LOVED it.  The originals are from Mari Designs on Etsy.  I modified them slightly by adding the top hat and using punched circles for the lumps of coal. 


I did a few really simple tags like this one; they're nice and easy but still quite pretty.


Lastly, I had to use my new Holiday Stocking die cut!  We're doing charitable donations in lieu of gifts for my brother and sister-in-law.  Since they're big cat lovers (and have three adopted cats of their own!) we decided a donation to the MEOW Foundation would be appropriate.  Instead of just a note in a card, I made a card to tuck inside of a stocking, and gave the stocking a cat-print trim.  Too cute, if I do say so myself!


Supplies as follows:

Rag quilt:  All fabric from Robert Kaufman.

Snowman tags:  White glossy paper from Canon (glossy photo paper); black and orange cardstock from Bazzil; Tangerine Tango ink by Stampin' Up; embossing folder from Cuttlebug; felt and snowflake button from craft supply. 

Basic Tag:  Tag die cut from Sizzix; cardboard from the recycling bin; ribbon from Stampin' Up; holly berry stamp from "Holiday Bingo Bits" by Stampin' Up; Garden Green ink from Stampin' Up; red marker and white opaque pen from American Crafts; Momento black ink; letters from Sweet Shoppe Alphabet by Stampin' Up.

Stocking:  Holiday Stocking die from Sizzix for Stampin' Up; cardstock (brown and ivory) from Bazzil; cat print paper from Max & Whiskers collection by Basic Grey; grosgrain ribbon from craft supply. 


Merry Christmas!

Thursday, December 8, 2011

Baby Boy - Birth Announcement & Thank You Cards

Our sweet baby boy, James Alistair, made his safe (and VERY slow!) arrival on October 2, 2011!  He is, without a doubt, my biggest love and brightest joy.


I created his birth announcements in Photoshop with a picture I took of him at about 10 days old.  They were printed and mailed to our family and friends.


And of course, I had to make a set of thank you notes for the gifts we've received!  I was on bed rest due to medical complications for the last 8 weeks of my pregnancy so I created a bunch of these prior to giving birth; of course, they were all gone by time he arrived and another batch needed to be made!  I've created about 60 of these notes; they're easy to make in a batch and there's a little bit of variety to keep me from getting bored with them.  


Supplies:  All supplies from Stampin' Up! unless otherwise noted.  Cardstock (Baja Breeze, Not Quite Navy, Whisper White); Fox & Friends stamp set; Baja Breeze ink; 1/8" taffeta ribbon in Baja Breeze.  "Thanks" sentiment from Gel-a-Tins; Embossing folders by Cuttlebug, Sizzix, and Quickutz.  

Saturday, May 28, 2011

Paper Mobile


I saw a mobile similar to this on Etsy; after a quick look, I realized just how easily (and cheaply!) they could be made!  I really wanted one for our nursery, so I decided to go for it.  The paper is so light and the strands twirl so beautifully; plus, with so many colours of cardstock available, it was really easy to match this to our other nursery decor.

While these mobiles are super easy, there are quite a few steps involved and they are quite tedious.  I figured I'd do a quick tutorial to walk you through it.  Please forgive the shifting colours and light as the day progressed in my bonus room.  :)


Supplies needed: 
6 sheets of 12x12 cardstock in your choice of colour(s)
1 small ball of thin twine or sewing thread
Circle punch or punches - I used three sizes (2", 1 3/4", 1 1/2") but you could easily do these with other sizes or even with all one size
Crimping beads - approximately 150-200 (optional)
Beading pliers (optional; only needed if using crimping beads)
Scissors
2' of dowling (I used 7/16" diameter)
Acrylic paint and a small paintbrush
Ribbon (approximately 8 feet)
Hot glue gun


PART 1 - Preparing the rack.
1.  Cut your dowling into two pieces of equal length.  Mine are 12" each, but size yours as you wish.  Sand the cut edges to remove any sharp bits.


2.  Paint your rods.  One coat of acrylic paint is sufficient.


3.  Mark your dowels at the midpoint (make sure to measure!)  Using a liberal amount of hot glue, glue your dowels together at the midpoint in an X (or +) formation.  Don't worry if the glue is messy; you won't see it in a minute.


4.  Wrap the intersection of the two rods with approximately 8-12" of ribbon, using hot glue to fasten the end.  Make sure you have approximately 7' of the same ribbon remaining; you'll need it later.


PART 2 - Preparing the mobile.
1.  Using your circle punch(es), cut circles from your cardstock.  If you are using more than one colour and/or more than one size of circle, make sure to alternate.  All together, you will need 148 circles to make 12 strands.  You will want some sort of pattern in each strand, so cut and arrange accordingly as your work.  I used three patterns on my strands (four strands of each pattern) but the circles varied in size.  I made four strands of 11 circles and eight strands of 13 circles.


2.  Arrange your circles into 12 lines.  Each line will become a strand.

3.  Using a sewing needle or pin, punch a hole in the center of each circle.  I found that pushing in the pin and rotating it  around worked well to make the hole large enough.  You do NOT want the holes perfectly centered, so eyeballing this step works perfectly.


This is where you have two options: either using knots or using crimping beads.  Using the knot method is VERY tedious - please keep in mind that for a mobile this size, you will tie approximately 600 knots.  This is why I switched to crimping beads and started over after doing a few lines.

4.  OPTION A:  Cut a length of twine (approximately 1 yard) and tie a large knot in the bottom.  Given that the twine is thin, each knot is usually 4-5 overlapping knots to make it an adequate size.  (From this point forward, please remember when I say "tie a knot" I'm actually referring to tying 4-5 overlapping knots.)  Thread on your first circle.  Tie another knot approximately 1" to 1 1/2" above the circle.  Thread on another circle.  Repeat with 11-13 circles per strand.  Set each strand aside as you continue working until all 12 strands are done.  (Hint:  I found it helpful to tape each strand to the bannister as I worked.  Use masking tape.)

OPTION B:  Cut a length of twine (approximately 1 yard) and flatten a crimping bead at the bottom.  Thread on your first circle.  Add another crimping bead approximately 1" to 1 1/2" above the circle.  Thread on another circle.  Repeat with 11-13 circles per strand.  Set each strand aside as you continue working until all 12 strands are done.  (Hint:  I found it helpful to tape each strand to the bannister as I worked.  Use masking tape.)

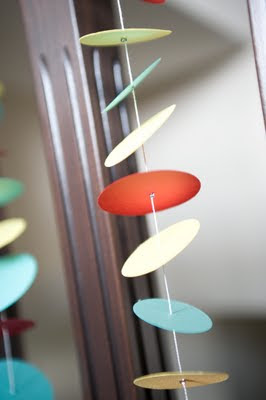
The photo shown is using the crimping beads.


These are my 12 strands, all shown together, taped to the bannister as mentioned above.


PART 3 - Putting it all together.

1.  Arrange your strands into two groups of six strands in the order you would like them to rest on the bars.  For the mobile to have this shape, you will want your longer strands in the middle of the mobile and the shorter strands at the ends of the rods.


2.  Starting with one rod, gather your outermost strands and tie the strand to the rod.  I simply tied a knot, wrapped the excess string around the rod a few times, tied another knot and trim the excess at both the top and bottom.

Please pardon my husband's hairy man-arms for the next few pics!


3.  Next, tie the innermost strands, repeating the same process as above.


4.  Lastly, tie on the center strands, aligning them between the inner and outer strands of each section.


5.  Repeat the last three steps on the other rod.


6.  Remember that extra 7 feet of ribbon I had you set aside earlier?  Cut it into five pieces:  four 18" pieces and one 12" piece.

7.  With each 18" piece, glue the end of it to the end of the rod with the remaining ribbon going toward the center of the mobile.  Repeat with each rod.


8.  Cut the remaining ribbon into four short (2"-ish) pieces.


9.  Wrap each short ribbon piece around the glued portion of the ribbon to cover the rough edge.


10.  Gather all four long pieces of ribbon toward the center and tie in a knot near the top.  Trim ends.


Your mobile is complete!


As I mentioned above, this mobile is very inexpensive to make.  Here's the breakdown (please note I don't include the cost of tools as I assume you have these already!)

6 sheets of cardstock at $0.70 each:  $4.20
200 crimping beads:  $10.00
Spool of twine:  $4.29
Spool of ribbon:  $2.00
Acrylic paint:  $0.99
Dowling:  $1.38

Total cost:  $22.86

If you choose to do the mobile with knots instead of crimping beads, your cost is only $12.86!  You just can't beat that. 

I hope this was helpful!  Please feel free to comment with questions or suggestions.  Cheers!

Monday, April 25, 2011

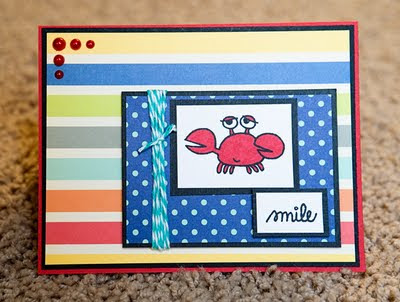
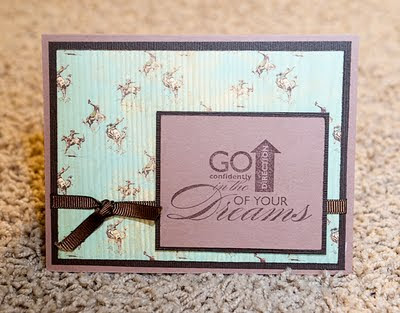
More cards, of course!

Here's a mishmash of everything else I've been up to in the last little while!


Let me know if you have any questions about supplies or techniques! 
Sunday, April 24, 2011

Home Sweet Home

I've been wanting to make a layout for our new house, which we moved into last June.  I keep procrastinating; since it was a new build, we didn't have grass... then the weather was bad... then it was winter.  Things are still really dead and brown outside, so I still don't have a photo and I'm waiting until spring has sprung before I take one, but I sat down and cranked out a layout today!  This will fit a 5x7" photo; I love the colours, the design, and the little chipboard houses at the bottom of the page!

I almost always use a sketch for my projects, but I just winged it for this one.  I absolutely love how it turned out!  It'll be tucked safely away in my album until we finally have some green grass outside.


The patterned papers in this layout are all from the Metropolitan line by American Crafts; I love buying coordinating sets because it takes the guess-work out of matching papers; everything is ready to go!  The cardstock is from Bazzil; chipboard houses (covered w/ patterned paper) by Maya Road; letters by American Crafts; circle punches by EK Success; eyelets by American Crafts.

Wedding Card

This design is one of my favourites; it's so simple to make but looks so beautiful and elegant!  I try to match the couple's wedding colours as best as I can for a customized look.  I've made a few of these in the last couple of years and they're always a hit with the bride and groom!


This particular card is for Steve's cousin, who is getting married in May.  Her invitation was eggplant and vanilla, so that was mirrored in the design.   The cake is super easy to make; just three rectangles, round the top corners, and emboss with your favourite embossing folder.  Layer with pop dots (the bottom layer is the highest) and tuck each layer under the one below it.  Couldn't be easier! 

I also stamped the inside of this card; I almost never put anything on the inside of my cards, but I just love this sentiment and really wanted to use it.  The ink is eggplant as well. 


Most supplies are from Stampin' Up:  Very Vanilla cardstock, stamped sentiment, ticket punch (inside corners) and felt flowers.  The purple cardstock is from Bazzil, the pearls are from Recollections, the corner rounder (on the cake) is from Marvy Uchida and the embossing folder is from Cuttlebug.  


Saturday, April 16, 2011

My latest project...

My husband and I are expecting our first baby this fall!

I'm now 14 weeks along, but I've been waiting to share this layout for quite a while now.  This picture is from our first ultrasound on March 1st, 2011.  Baby was tiny, only 4mm long, with a little tiny flicker of a heartbeat.  It was amazing.


The journalling reads, "The first time we saw you on an ultrasound was an amazing experience; your heart was beating like crazy and it was the most beautiful thing I'd ever seen."  

Papers, journalling card from October Afternoon (Daydream collection.)  Ribbon, button, and twine from Stampin' Up.  Glimmer mist used to distress papers.  Green letters from an unknown source (they've been in my stash forever!) 

Sunday, January 16, 2011

"Early Bird" by Cosmo Cricket

Cosmo Cricket's "Early Bird" line remains one of my all-time favourites.  I bought the whole collection and later won a crafting kit from Cosmo's blog, so I have TONNES of this paper... and I'll probably still be broken hearted when it finally runs out!  Here's three sweet cards I made with this beautiful collection.


October Afternoon - Schoolhouse, Modern Homemaker, and Campfire

I waited SO long for the new October Afternoon lines to arrive at my LSS.  They were debuted last summer and finally came into stock just before Christmas!  I've had a lot of fun with these three beautiful lines and here are a few of my favourites:

From the Schoolhouse line:


From the Modern Homemaker line: 


From the Campfire line: